The clean and press is an underrated exercise. Many people push it to the side because they think it is too complex, they don’t understand how to perform the technique correctly, or they think it's a technique exclusive to Olympic lifting. However, the clean and press is a great lift to incorporate into your workouts, and here are a few reasons why.
Clean And Press Benefits
The main muscle worked in a clean and press is your shoulders, but the movement also works your traps, triceps, middle and lower back, abdominals, glutes, quadriceps, hamstrings, and calves. It is a full body exercise, which not only can be performed for hypertrophy, but also for strength. There is also a big endurance component to performing this lift. Whenever I perform sets of the clean and press I get drenched in sweat and my whole body aches afterwards. This lift allows you to build stamina and cardiovascular endurance, as well as muscular endurance and even strength.
In order to write this article better, I gave myself a month to learn how to perform the clean and press properly. Let me tell you, after the first day of attempting it, my traps were so incredibly sore. Every movement hurt the next day! But over the course of the month, my muscles adjusted and the delayed onset muscle soreness (otherwise known as DOMS) went away.

How To Perform The Clean And Press
As for how to do the technique properly, I will admit that it took a long time to learn it and feel comfortable with the motion. Even after a month, I am still not 100% confident with my technique, despite doing hundreds and hundreds of reps. I think this lack of confidence stems from the different bar path that this lift has in comparison to the other lifts I am more familiar with (squat, bench, deadlift, rows, OHP, etc.). In the clean and press, there is no quick start and finish. Instead, the lift is broken down into two parts – the clean, and the press – and then within the clean lies a front squat.
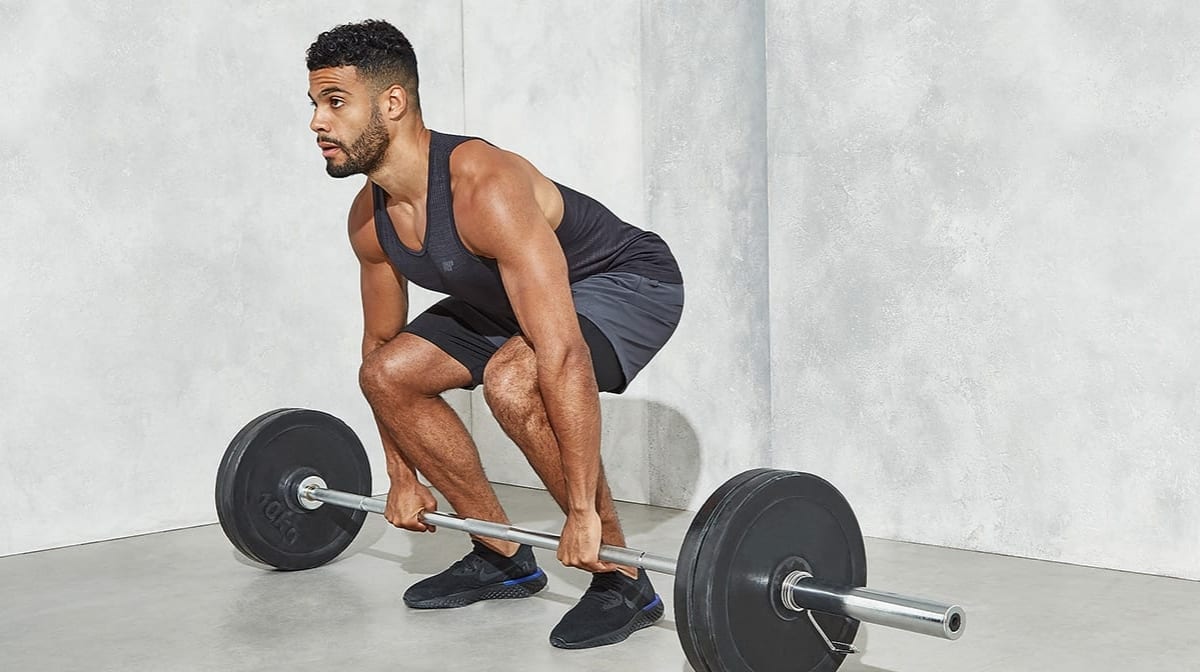
To start the clean and press, you stand with your feet shoulder-width apart, your knees bent, your knees in between your arms (think about the way you set up for a deadlift), and your elbows flared out. Just like a deadlift, the clean and press begins with a flat back, bent hips, bent knees, bar close to your shins, and arms fully extended grabbing onto the bar. The grip for a clean and press is different from a deadlift grip. In a deadlift, you can grip overhand (pronated), or one hand pronated and the other supinated. In the clean and press, however, your grip is overhand (both hands). The grip placement is just a bit wider than shoulder width (this is to accommodate for the clean part of the lift), and your shoulders sit a bit over the bar.

As with a deadlift, you initiate the lift by extending with the knees. This is going to begin the upward movement of the bar. Where a deadlift and a clean and press diverge, however, is the point where the bar passes the knees. When you reach this point, there is a triple extension at the ankles, knees, and hips, with simultaneous shoulder shrugging to guide the bar into the correct finishing position.
Once the bar is in the air, you descend into a front squat and catch the bar on your way down by rotating your elbows under the bar so you finish with your elbows parallel to the floor and the bar sitting in your fingertips resting on your clavicles. You catch the bar on the descent, ascend with the bar in the same position in which you caught it, and then you gear up for the press part of the lift. In order to do the press, you tighten your core, squeeze your glutes, and press upwards.
The bar should end up over your head, not in front of it. Then, you lower the bar back to your clavicles, bring it back to the floor, and repeat!
Take Home Message
As always, be careful with this lift. The more tired you get, the more your form breaks down, and the more you increase your chance of injury. Take ample rest between sets, take it slow, to begin with, and most of all, have fun!
